How to migrate WordPress site from one domain to another domain hosted in SeekaHost.app?
Are you not happy with your existing web hosting services?
Time to migrate your site from your existing web hosting company to SeekaHost. I am presenting to you an easy-to-understand guide with simple steps for your site migration.
Follow this guide, where I will show the SeekaHost plans and site migration procedure.
Top Reasons To Transfer Your Site To SeekaHost
Before proceeding with the steps of transferring your site, here are the reasons to choose SeekaHost over other hosting providers.
Single Interface For Site Management
SeekaHost.app has its proprietary user interface. The dashboard is unique with a clutter-free and ad-free design.
The dashboard is made in such a way that anyone without zero prior experience can manage their websites.
I can bet that the interface is easier than most of the common control panels like cPanel or Plesk.
The dashboard allows you to buy domains and hosting from the same control panel. You don’t have to leave the dashboard to buy any services or manage your site.
The SeekaHost.app control panel allows you to add SSL, create a custom domain email address, and configure the nameservers and DNS records.
Top-Notch Security with Free SSL
No matter which WordPress hosting plan you choose, you get a free SSL certificate. An SSL certificate ensures your site protection around the clock.
The best part is that you get it for free with no upfront cost. Till you have the SeekaHost.app WordPress hosting, you get an SSL for free.
While other hosts charge you some dollars, SeekaHost.app does it for free.
You can install the SSL for your domain with one click and activate it at your fingertips. For managing SSL, you don’t have to leave the dashboard.
Custom Business Email For your Domain
When you transfer your WordPress site to SeekaHost, you get a free business email. No other hosting provider offers this feature.
Again configuring your business email requires easy steps that you need to perform within the dashboard.
You get a free business email when you register a domain at SeekaHost. Or you can buy an email hosting plan starting at just $1 per month. The plan offers one mailbox and 5 GB of email storage space.
Dedicated Customer Service
SeekaHost may not be a very old hosting company but has the best team. The team comprises technically sound WordPress experts.
Your queries never go unheard and the response time for queries is quick. You can contact support from within the SeekaHost.app dashboard.
Let me show the SeekaHost.app WordPress hosting plans so while transferring your WP site, you know which plan to choose.
SeekaHost WordPress Hosting Pricing & Plans
Unlike other hosts, SeekaHost.app gives you a choice of choosing control panel. The price of WordPress hosting plans may vary according to the control panel you choose.
You can choose the SeekaPanel, cPanel, or Plesk control panel. I would recommend you choose SeekaPanel which has an easy-to-use interface.
If you choose the SeekaPanel, you get 4 WordPress hosting plans to choose from. The plan starts at $1.49 per month and goes up to $12 per month. Let’s take a look at these plans first and then proceed with steps to transfer your WordPress site.

Starter: $1.49/month
This is the basic WordPress plan that offers a single WordPress site with 2 GB space and 10 GB bandwidth. The plan includes a one-click WP installer, DDoS protection, malware scanning, and a free SSL certificate and activation at one click. The only drawback of this plan is that you don’t get support but site migration is free.
Standard: $5.50/month
With this plan, you can host up to 3 WordPress sites. All the features of the Start plan are included but the disc space and bandwidth are increased. You get 15 GB of disc space and 30 GB of bandwidth.
Growth: $8/month
Run up to 5 WordPress sites with the Growth plan starting at $8/month. All the Standard plan features along with 50 GB of disc space & 50 GB of bandwidth are included in this plan.
Premium: $12/month
For running WordPress sites up to 10, this is the best plan. The plan starts at $12/month. This includes 100 GB of disc space and 100 GB of bandwidth. With this plan, you get both WordPress support and remote support.
How to Transfer WordPress Site To SeekaHost?
Coming to the main part of this guide, I am gonna show you site migration steps to SeekaHost. Since you already have a WordPress site running, you already have a domain. You need to buy a WordPress hosting plan and I have shown you the plans already.
Steps To Buy WordPress hosting plan at SeekaHost.app
Out of four WordPress hosting plans, you can choose anyone.
Create a free SeekaHost.app account using your email address. You can choose to pay monthly or annually.
Once logged into the SeekaHost.app control panel, go to Plans and click on WordPress hosting.
Choose any one plan and click on Buy Now. You can now choose to pay either monthly or annually.
On the right side, you can check the total billing amount. Confirm the amount and click on Continue to Subscribe.
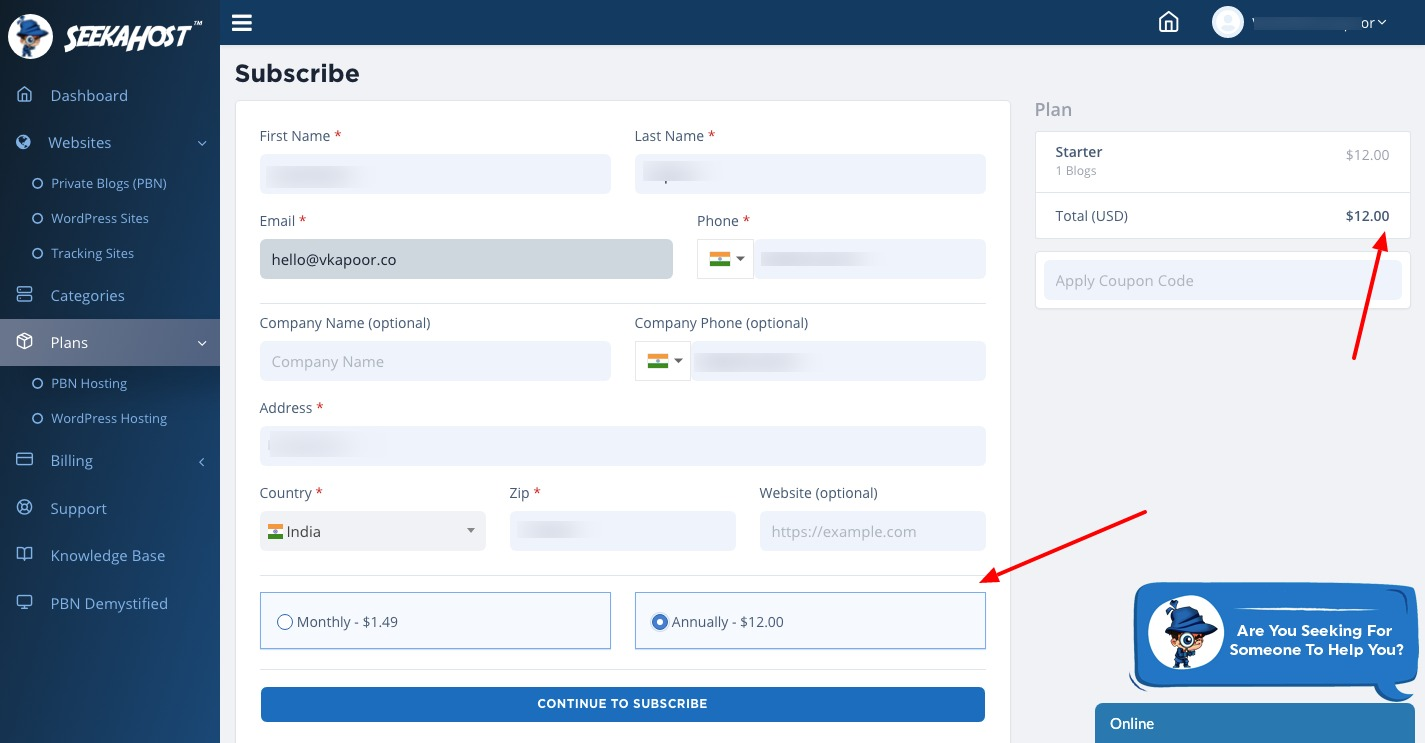
You can pay via PayPal or credit card. Once the hosting is purchased, you will receive an email with the hosting details.
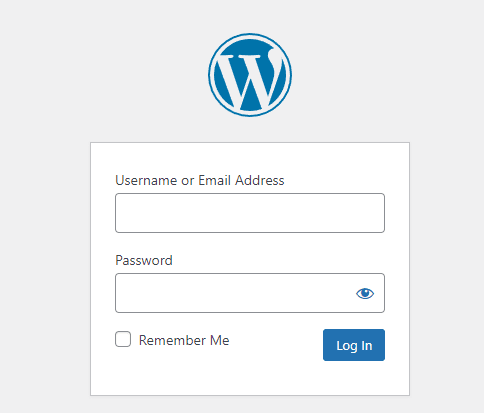
Now that you have a hosting package, let’s log into your existing WordPress site dashboard.
You already know how to log into your WordPress dashboard. If not, simply use /wp-admin with your site name.
Just like https://www.fernandoraymond.com/wp-admin/
This way you can log in to the backend of your WordPress site.
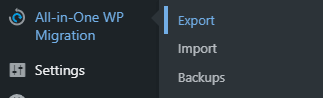
Once logged inside your WordPress dashboard, go to Plugins> Add New and look for All in One WP Migration.
This plugin is required to take a backup of your complete site and then upload the backup on your new hosting. Instead of All in One WP migration, you can also use the UpdraftPlus plugin for backup & restore.
To install the plugin, click on Install Now and once the installation is complete, click on Activate.
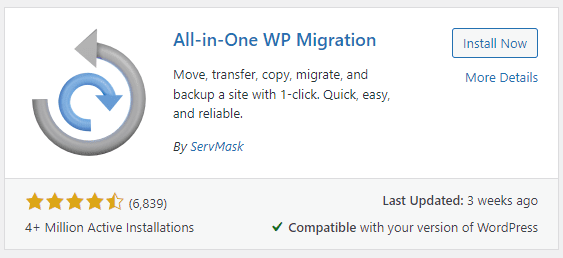
When the plugin gets activated, you can see it on the left side of the dashboard. Move your cursor over All In One WP Migration and click on Export.
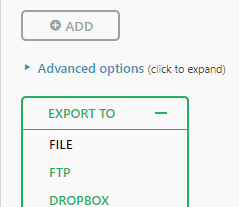
Before you export your site data, ensure that themes and plugins are updated and SSL is active.
You can export the site data to Dropbox, or FTP, or save the file on your local computer.
Once the file export is completed, you can download it to your local computer.
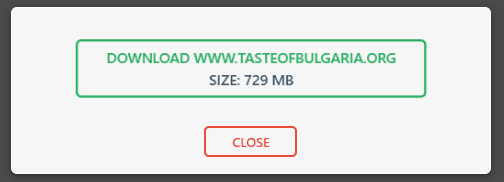
So you have a backup of your WordPress site and you can now delete the website from your existing hosting provider. You can upload the backup of your WordPress site to SeekaHost within minutes.
The free version of the plugin allows backup of up to 256 MB. You can increase the file size by customizing the wp-config.php file using the code provided below.
- @ini_set( ‘upload_max_filesize’ , ‘128M’ );
- @ini_set( ‘post_max_size’, ‘128M’);
- @ini_set( ‘memory_limit’, ‘256M’ );
- @ini_set( ‘max_execution_time’, ‘300’ );
- @ini_set( ‘max_input_time’, ‘300’ );
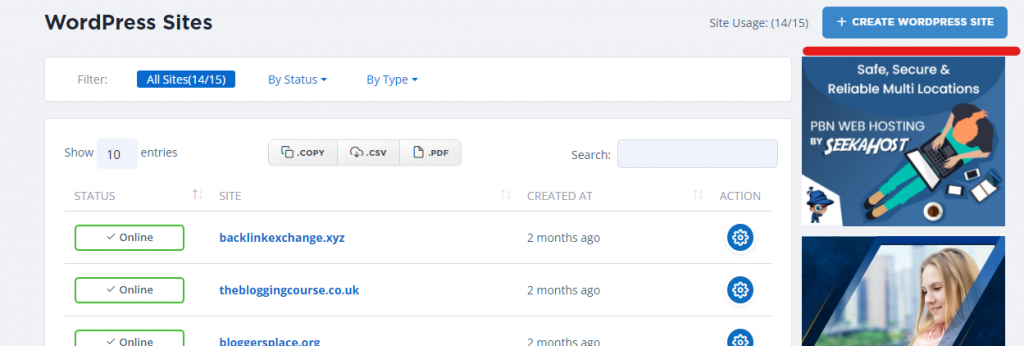
You should now log into your SeekaHost.app control panel. Go to WordPress Sites > Create WordPress Site.
Choose the domain and enter the blog title. Finally, choose the package and toggle the visibility button.
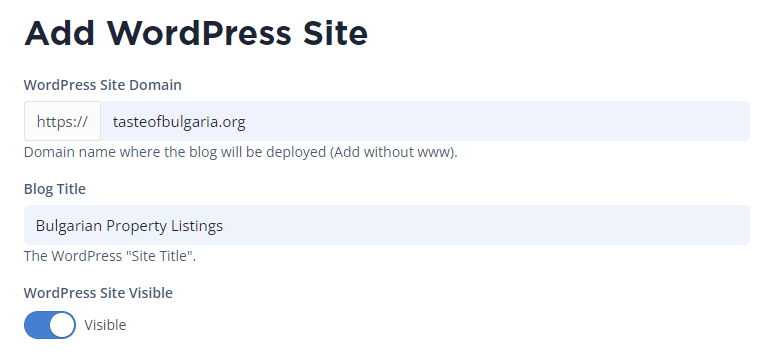
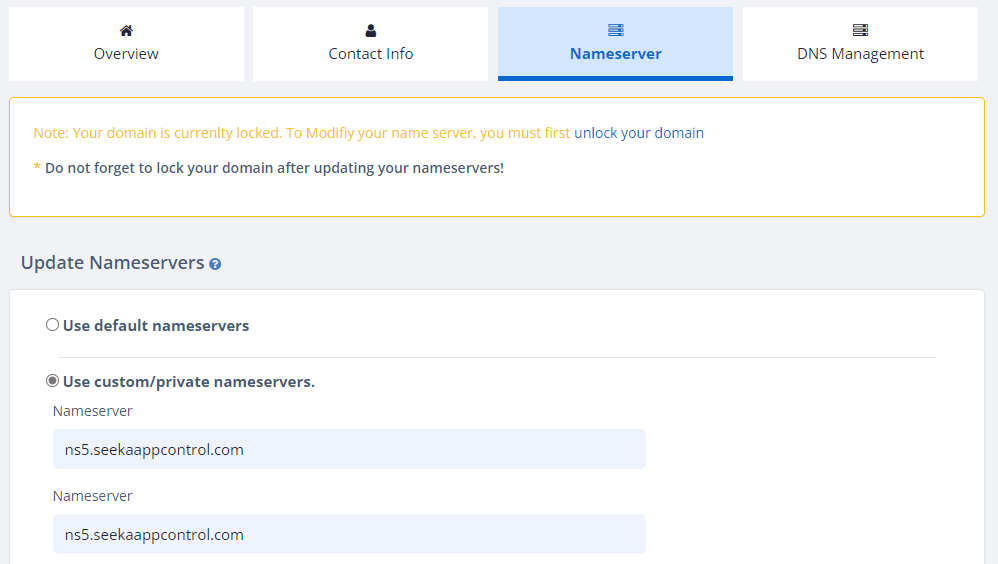
Your WordPress site is created and you can see the status as Online. You should now change the nameservers of your domain.

Copy the Nameserver 1 and 2 and then log in to your domain registrar. Go to the domain settings and update the below nameservers so your site is pointed correctly.

If your domain is registered at SeekaHost, you will first have to unlock your domain and then you can make the changes.
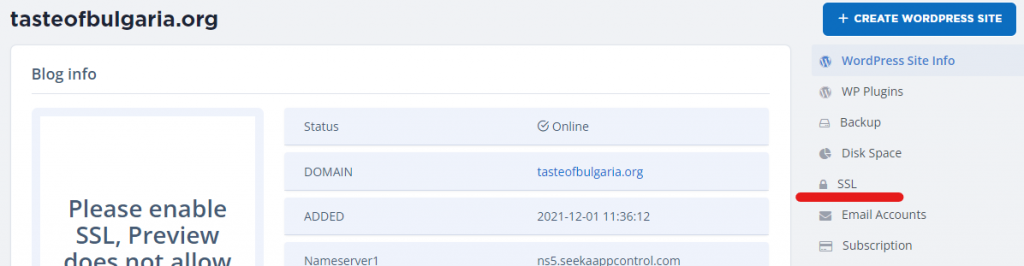
You have successfully changed the nameservers. You can now active SSL on your WordPress site migrated to SeekaHost.
To activate SSL, go to Domain and then settings. Find the SSL option on the right side and click on it. Simply toggle the button to activate the SSL with one click.
To upload the backup of the WordPress site, you need to log in to your SeekaHost WordPress site dashboard. You can log in using your site name along with wp-admin. You can find the username and password in your email.
Again go to Plugins > Add New and install the All In One WP Migration Plugin. Activate the plugin and hover over it.
When you took a backup you chose the Export option. Now you need to choose the Import option.

Choose Import From File and browse the zip file of your backup from your local computer.

It will take a few minutes to import the backup file.

Once the import is finished, you will be logged out of your site. You can log into your site again using the same username and password.
Your WordPress site is successfully migrated to SeekaHost and up & running.
Conclusion
Although the steps might not be easy if you are not a tech-savvy person. You can always get help from the SeekaHost support team and get the issues fixed.